Lets Eat! Starting Solids

It’s an exciting time. You and your baby are ready to explore the world of food together!

IMG_2393 (1)

Most doctors recommend starting between 4-6 months. Our doctor said Jules was ready at 5 months based on how she was sitting and her cues (beginning to show interest in what I was eating and trying to grab food from my plate). Back in the day, it was very common to begin with rice cereal because it is thought to be easy to digest. Nowadays, rice cereal is falling by the way side (did anyone see yesterday’s news report? Arsenic???) and most doctors will give the green light to begin with oatmeal or vegetables. Ask what your doctor recommends at their four month check up so you can put your plan in place.

First, will you be making some or all of your baby’s food? If the answer is yes, you may want to look at baby food makers and there are certainly plenty on the market. Since I knew I would be making some but not most of her food, I didn’t want to invest in yet another gadget. I have a Vitamix (which I highly recommend because it rocks) and a steamer and that is really all you need. I picked up a few freezer containers so that when I make a batch of food, I can freeze the rest in individual containers.

You will also need soft spoons, small bowls, and a ton of bibs of you don’t have already.

white-baby-cambria-divided-plate-bowl-set-c

I love this bowl and plate set and it’s currently on sale at Pottery Barn Kids

Next, if you’re buying foods, you’ll be starting with Stage 1. Baby foods come in stages based on the simplicity of the food, the amount it is pureed, and the size. For example, a Stage 1 food may simply be “carrots” while a Stage 2 may be “carrots, butternut squash and apples”. Stage 1 foods are typically 2 ounces while stage 2 are between 3.5-4 ounces. I did a lot of research on brands and I stick with Plum Organics and Happy Baby. Both are organic with non- GMO ingredients but what I think sets them apart is the variety of meals after stage 1 and less added ingredients. At most of my local stores, the stage 1 foods were in short supply (so annoying) so I did a big order from diapers.com and stocked up.

As per the doctor’s recommendation, we gave the same food for three days in a row to watch for allergies. We would try new foods either in the morning or around lunch time to allow for plenty of time to watch for any adverse reactions before bed.

With fruits or vegetables, you would begin by giving half the pouch and give the remaining half the next day (they are good refrigerated for 24 hours). If beginning with cereal, follow the directions on the box. If your baby is eating everything you are serving and wanting more, increase the amounts.

After we had a few foods under our belt, a typical schedule looked something like this.

7am- bottle

8am- oatmeal with fruit (we love this oatmeal that was recommended by a friend)

11am- bottle

12pm- a vegetable

You’ll then add dinner and eventually replace the afternoon bottle with a snack.

I felt strongly that I didn’t want to give her vegetables combined with fruit because I thought it would possibly turn her off to regular vegetables (I worried she would grow accustomed to the sweetness of the fruit) so I stuck with stage 1 for awhile.

Even now at 9 months, I still buy stage 1 fruits and buy only stage 2 vegetable meals, always with some type of protein.

Random Tip– Target makes these fruit pouches that we buy for the big kids which have exactly the same ingredients as the baby food pouches for a lot less $ so if you are a Target shopper, make sure to check them out

Jules did experience some constipation when we began solids, which is fairly common. Prunes and pears, as well as the probiotic oatmeal, worked wonders. We still stay away from bananas because they are so binding.

At our 8 month check up, we were given the green light for her to eat anything (with the exception of cow’s milk and honey which cannot be given until after the first birthday). Now the real fun begins!

All advice above is solely my personal opinion based on my experience. Always consult a medical professional with any medical concerns. 


Hush, Little Baby- Sleep Tips For The First Month

DSC_3797

First, my disclaimer- I am not a sleep expert by any means. However, I have had three babies who are all good sleepers and I do think it has to do with the sleep strategies I have put in place from day 1. So here is my wisdom, taken from experience and countless books and articles regarding sleep. Since it’s a lot to take in, I’m going to do it in multiple posts, broken down by months.

Month 1

Terms to Know-

  1. E.A.S.Y- Eat, Awake/Activity, Sleep, You Time
  2. Swaddle- The way you wrap a baby to prevent the Moro Reflex that WILL wake them if they are not properly swaddled (up to months 4-5)

Items You Need-

  1. Swaddle blankets
  2. Sound Machine
  3. Pacifier, if you chose to use one

With a brand new baby, any type of schedule is difficult to put into place. My advice for the first month is to keep EASY in mind but don’t worry if the baby won’t stay awake after eating. The Optimal Sleep Time for the first month is no more than 40 minutes, and usually a lot less. Try for stimulation but babies need A LOT of sleep so let that baby sleep! *** It is important to realize there is a difference between real sleep and comfort sleep. Let me explain. A real sleep will happen anywhere. The baby is tired and needs sleep. A comfort sleep happens when the baby is comfortable, in your arms for example. They doze because they are content. When it’s awake time and the baby is sleeping in your arms, make sure to put the baby down and see if she stays asleep. That’s how you’ll know the difference.***

During the day– When you want the baby to sleep, I recommend a light swaddle such as the Aden and Anais blankets. I use the crib from the start for at least 1 to 2 naps which I think is helpful later on. For some reason, moms can be scared to use the crib so I recommend starting during the day when you’re awake so you start to feel more comfortable.

At night, from now until around week 10– Swaddle that baby tightly using the Summer Swaddles (I tried soooooo many and these were the best). I recommend putting the baby down for the night in a flat bassinet, pack and play or co-sleeper in your room. Then when she wakes for the middle of the night feedings, keep the lights very, very dim, change her, feed her (keep talking to a minimum) and put her back to bed. Yes, even if she’s still awake. You are starting right away to teach her to fall asleep drowsy.

Notice

It is not an easy month. You will be sleep deprived. And cranky. And more in love than you thought possible (even if it’s not your first!). If you take only one thing away from this article and by far the most important sleep advice for this month- DO NOT GIVE UP ON THE SWADDLE! The Moro Reflex is a very real thing and all babies have it. You must find a swaddle that works for you and your baby to extend a deep, restful sleep for you both.

*ALWAYS PUT A BABY TO SLEEP ON THEIR BACK*

All advice above is solely my personal opinion based on my experience. Always consult a medical professional with any medical concerns. 

Have Baby, Will Travel- traveling with an infant under 6 months

First post in awhile! Life’s been pretty busy with five kids, go figure 😉
I’ve actually written a few travel posts previously because I love traveling and we frequently travel with our kids but, let me tell you, I was quite stressed about traveling with a five month old! We had a trip to Florida planned when Jules was about five months and then a trip to Puerto Rico planned a few weeks after that, just shy of her turning six months. What did I really need? How would I keep her on any type of schedule? Would it be enjoyable for any of us?
Well, after the two previously mentioned trips, I’m here with exactly what you need and what worked for us.
The Gear, Specifically For Babies 6 Months and Under~
Infant car seat and base
Snap and go (or similar)
Large bag to gate check car seat and base
IMG_1926
Travel Sound Machine- a lifesaver!
Packing for the Baby
I packed each “day” outfit, complete with socks and a headband (of course), as well as pajamas, separately, each in large ziplock bags. At this point I didn’t see a need for “night” outfits for her.
I also packed in 4 separate ziplocks—
1. Three extra complete outfits
2. Swimsuits, swim diapers (two for each day), her sunscreen, and her bug spray
3. Bibs (two bibs for each day)
4. Medicine (thermometer, teething tablets, gas drops, cough syrup, vapor rub, saline spray)
Ziplock full of medication- none of which we needed, thankfully!
In our checked bag, I packed an entire, unopened can of powered formula, her daily food (not much at this point), extra spoons, an entire unopened pack of diapers and wipes, the mat that she loves to lay on, and quite a few toys. I picked up this mat for our PR trip and I can’t say enough about it! It was perfect for her at six months because she was rolling all over the place and it’s huge. I can see us using it later at the park and beach as well.
IMG_1928
Jules on her favorite mat in Florida, before she was rolling over
Traveling
First, check everything you can. We checked our own bags, including a suitcase packed exclusively with the baby’s stuff mentioned above and her travel crib (I highly recommend the Lotus crib- super light weight and very easy to put up and take down). We carried on a very well-stocked diaper bag, plus a backpack with extra bottles, formula and the ziplocks with the medicines (all under 3.5 ounces) and the extra clothes just in case we were delayed or our bags were lost.
We elected not to buy her her own seat. I figured at this point she’d be in my arms regardless. I was lucky enough to have a friend who had a spare infant car seat and snap and go so I borrowed that instead of bringing our own. Most people will need to bring their regular car seat and base and snap and go, which would still work beautifully. We used this throughout the airport and gate checked it right before we boarded the plane. We put the car seat and base in the travel bag to keep it clean and prevent damage.
On the plane, she was pretty good. We timed the flights to coincide with her nap time so I fed her during take off and she fell asleep shortly after. Normally she sleeps for two hours but she slept for about 45 min both times (one sleep cycle) and then was up. I don’t normally use pacifier clips but they are so necessary when traveling so the damn pacifier doesn’t keep falling on the floor. I definitely had to walk her back and forth a bit when the crankiness began but overall all she did great.
IMG_1942
I’m in love with this travel crib!
Schedules
I am the first to admit I can be a bit neurotic when it comes to schedules (this is what works for us; no judgement whatsoever to all the non-scheduled babies and mamas!). Jules is a great napper and sleeper and I attribute that to her consistent daily schedule so I wanted to keep to it as much as possible without sacrificing our vacation. Here’s what worked for us~
  • 7:30am- Wake up at normal time. Because there was an hour difference in PR, that meant an hour later- score!
  • 7:30-9am- After her morning bottle, I’d get her dressed and take her down for a walk around the hotel while I grabbed coffee and breakfast. We’d check out the beach and pool area and it was nice and quiet. This was actually one of my favorite times of each day.
  • 9am- Time for her morning nap. I’d put her down, then quietly sneak out for my alone time by the pool/beach (leaving my hubby sleeping- must be nice!)
  • 10:30- she’d typically wake around 11 so I would come back up at this time. By now, my husband was up and ready to go down to the pool. He’d leave, I’d get her up and fed and then bring her down to hang with the family at the pool/beach. We’d all have lunch and by the time she was ready for her afternoon nap around 1, I was ready for a break from the sun too. I’d put her down and read my book or take a nap, depending upon how many cocktails I enjoyed by the pool 😉
  • 3pm- She’d wake up, have her bottle, and then we’d do our afternoon activity (we checked out the rainforest and Old San Juan in PR and visited family in FL)
  • 7pm- Dinner for all of us. I’d already have her in PJs and feed her her bottle at dinner. She’d typically fall asleep during our dinner but transitioning her to her crib wasn’t an issue.

DSC_0381
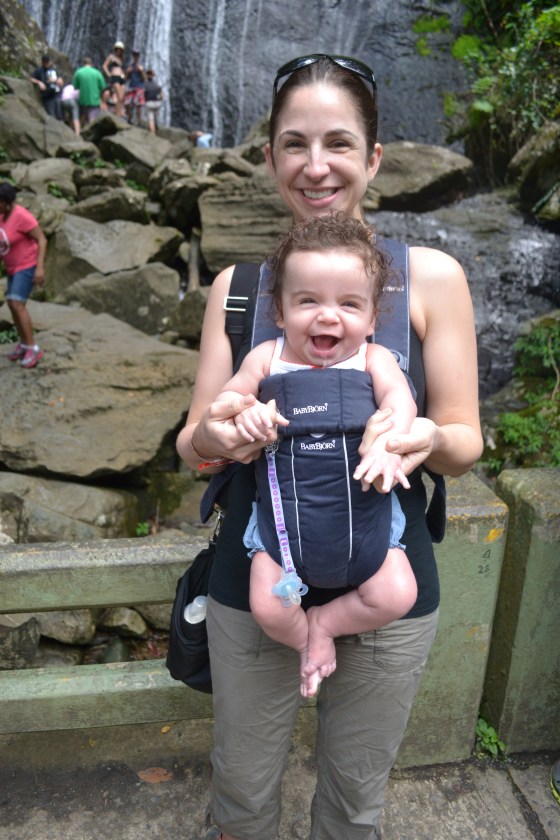
Exploring the rainforest

Bottles
This was the part I had the most difficulty wrapping my head around before the trip for some reason but it really wasn’t as challenging as I thought it would be. I picked up this great travel bottle washing kit and drying rack and these microwaveable sterilizing bags and packed enough bottles for a full day, plus one, which meant we had to wash/sterilize bottles every day. I designated my husband in charge of this and he did great. He set up a nice area on the counter (bathroom in FL/small kitchen in PR), using lysol wipes to wipe everything down, and made space for clean/dirty bottles. Then, every night, he’d wash the bottles in the sink and then sterilize them in the microwave using the bags. It worked perfectly. We stocked up on bottled water upon arrival and filled the bottles with water so they were ready to go for each feeding. She is ok with taking bottles at room temperature so we didn’t have to worry about heating them.
Fun?
My final concern was would these trips even be enjoyable. Admittedly, traveling with a young baby is definitely more work and not as relaxing. However, what can compare with your baby’s first time going into a pool or watching their expression as waves touch their feet for the first time? Nothing! The older kids had a blast and we created some very special family memories, which to us is the point of family trips. It was fun and I’d do it again in a heartbeat!
DSC_0334
First time on the beach
I hope these tips help if you are planning a trip with a young baby.
xo,
Tanya